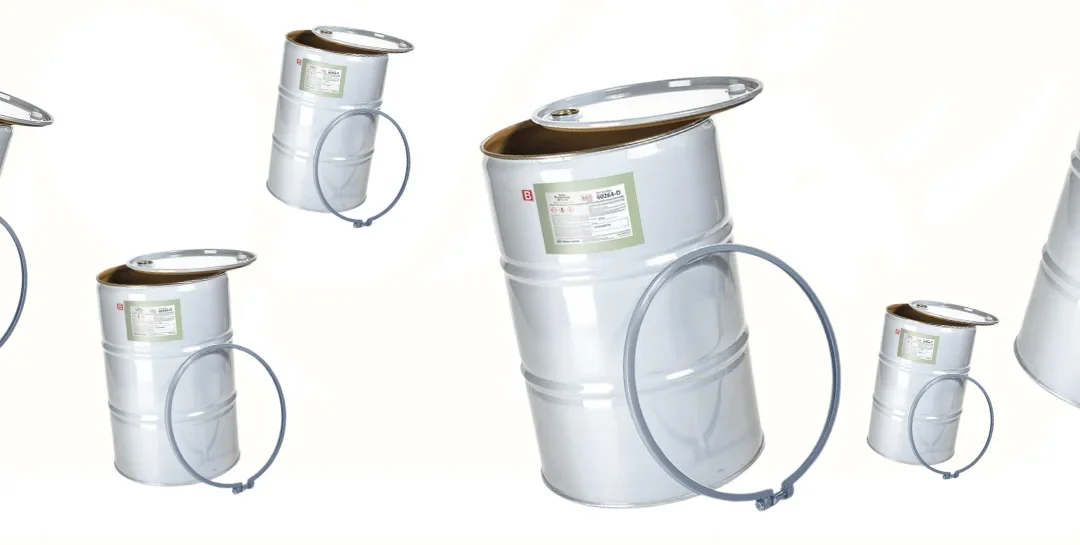
Removable Drum Head Procedures
How to Replace and Prepare a New Resin Drum (Step-by-Step Guide)
Swapping out a resin drum sounds straightforward — but skip a step, and you risk poor mixing, pump issues, or inconsistent output. This guide walks you through exactly how to replace a resin drum on your machine, from positioning the new drum to getting your pump back up and running.
Follow these three steps and you’ll have your new drum properly seated, mixed, and ready to go. You’ll also find the tools you need listed at the end, along with a time-saving tip about the removable drum lid setup.
What You’ll Need Before You Start
Gather these tools before getting started so you’re not hunting for anything mid-process:
- ½” electric chucked power drill
- 50-gallon Jiffy Mixer (PS-2 model)
- 13mm socket and impact gun
- 5-gallon bucket
Step 1: Position the New Resin Drum
Place the new resin drum on the B-side of the machine — that’s the blue label side. Once it’s in position:
- Use your 13mm socket and impact gun to remove the bolt.
- Slide the collar down the drum.
- Remove the lid.
With the lid off, you’re ready to move on to mixing.
Step 2: Hand Mix the Resin Thoroughly
This step is critical. Resin settles during storage, so the solids sink to the bottom of the drum. Before the drum goes into regular use, you need to bring all of that settled material back into suspension.
Using your ½” drill with the Jiffy Mixer attached, mix from the bottom of the drum upward. Work thoroughly for 5 to 10 minutes — don’t rush this part.
Once you’re done mixing:
- Unplug the drill.
- Wipe the excess resin off the Jiffy Mixer.
- Place the Jiffy Mixer in the 5-gallon bucket and set it aside.
Important: Hand mix every new resin drum before its first use. After that first use, daily agitation is all you need — no more hand mixing required.
Step 3: Reinstall the Drum Pump and Recirculation Lines
Now that the resin is properly mixed, it’s time to get the drum connected and ready for operation.
- Reinstall your drum pump and recirculation lines into the new drum.
- Bring the collar back up and tighten the bolt using the same 13mm socket and impact gun.
- Run the agitator for 30 to 45 minutes to complete the mixing process.
At this point, your drum is fully set up and ready to run.
The Removable Drum Lid: A Time-Saving Feature Worth Knowing
One of the standout benefits of this setup is the removable drum lid system. Because the drum pump and recirculation kit stay permanently attached to the lid, you never have to disconnect and reconnect everything when switching drums.
Instead, you simply swap the entire lid from one drum to the next. It’s a small design detail that saves real time during drum changes and reduces the risk of connection errors.
Quick Recap
Here’s the process at a glance:
- Step 1: Position the drum on the B-side, remove the bolt, collar, and lid.
- Step 2: Hand mix for 5–10 minutes, then clean and store the Jiffy Mixer.
- Step 3: Reinstall the pump and lines, tighten the collar, then agitate for 30–45 minutes.
Hand mixing is only required for new drums before first use. After that, daily agitation keeps the resin in suspension. Stick to this process and your equipment will run cleanly and consistently every time.